How Do I Bind with the supu pc430 Coil Binding Machine?
- Share
- Issue Time
- Sep 21,2017
How Do I Bind with the supu pc430 Coil Binding Machine?
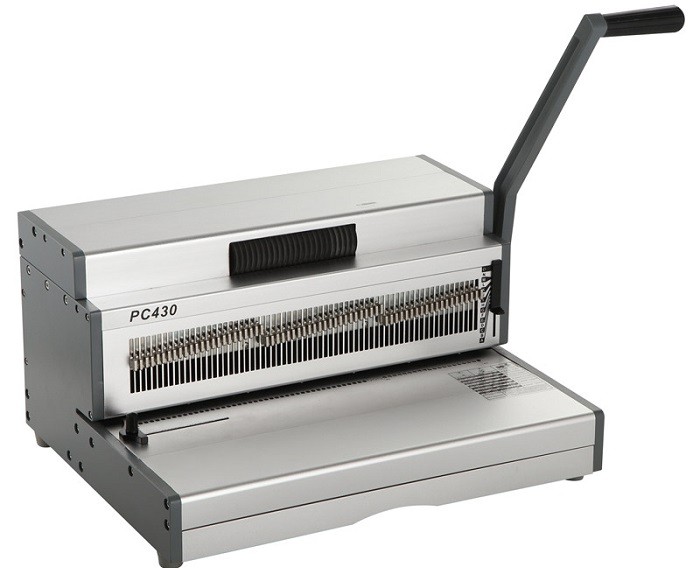
The supu pc430 coil binding machine is a light-duty coil binder that pairs a powerful, manual punch with an electric coil inserter to provide increased productivity at a budget-friendly price.
Below are step-by-step guide to binding documents with the Office supu pc430 coil binder:
1.If you have not yet used your Office supu pc430, you will need to set it up prior to binding. Begin by removing the blue knob located on the right side of the machine, then insert the binding handle into the side of the machine. Replace the blue knob and tighten it to secure the handle. Connect the foot pedal to the machine, then plug the power cord into the machine and a power outlet.
2.Adjust the side guide to center the holes on the page. The side guide can be easily adjusted by loosening the screw, positioning it on the machine base, and tightening it to prevent it from moving.
3.Set the punching depth margin using the blue bar located on the right side of the machine base. The punching depth margin is the amount of space between the edge of the paper and the punched holes - generally set larger for thick documents and smaller for thin documents.
4.Eliminate any holes that would be partially-punched along the ends of your document using the disengaging dies. Pull the corresponding arm outward from the machine to prevent a die from punching; push the arm back into place in order to re-engage the die.
5.Place up to 20 sheets (based on 20 lb. paper) into the punching throat, aligning the pages against the side guide and the back of the punch. Properly aligning your pages before punching helps to provide consistent hole placement throughout your entire document. Note: Since the punch is manually-operated, some users may find it more comfortable to work in sets of no more than 12 pages. This will help to reduce fatigue and provide a smoother punching experience.
6.Pull the punching handle forward to punch through the sheets, then push it back into its upright position to retract the punching dies. Pull the punched pages out of the machine.
7.Repeat steps 5 - 6 until all of the pages of your book have been punched. Arrange the sheets in order from first to last, tapping them against a flat surface to align all of the holes.
8.Manually insert a spiral binding coil into the first 4 - 5 holes of your document.
9.Press the foot pedal to begin spinning the electric coil inserter. Position the spine of the book so that the coil extends to the right side of the book and the holes are to the left. Lightly touch the coil against the inserter to advance the coil through the book. To make the inserting process even faster, you can move the book to the right as the coil is feeding through the holes.
10.As soon as the coil reaches the last hole, lift off of the foot pedal and/or pull the book away from the roller. If you accidentally advance the coil too far, you can flip the book over and use the electric inserter to feed it back as much as necessary.
11.Using a coil crimping and cutting tool, trim away the excess coil from the ends of the book and crimp the tips to secure the pages in place.